
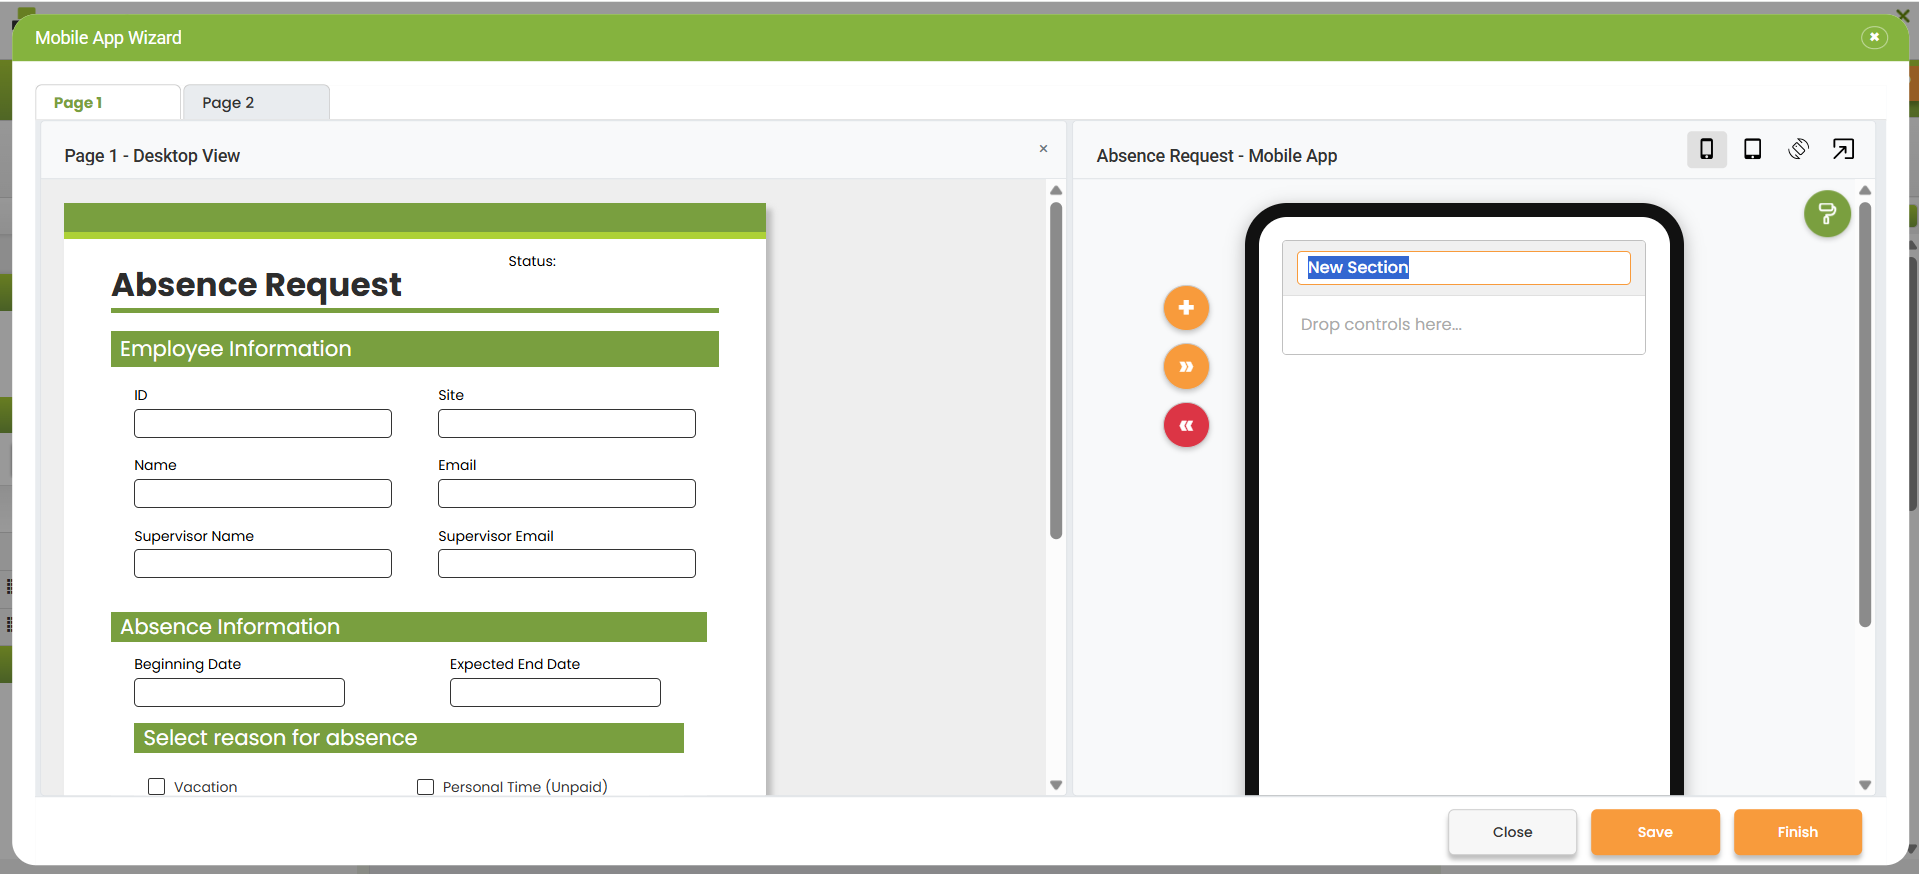
The first step in the Mobile App Wizard is to create and name sections for every page in the app. The first section is automatically created in the right-hand panel and highlighted, allowing you to rename it.
From this screen, you can:
oChoose which page you want to work with by clicking on the page tabs at the top.
|
If you don't create any sections for a particular page, it will not be possible to view any objects from that page on a mobile device. |

oUse the add button  to add a section.
oUse the delete button  to remove a section.
oUse the up and down buttons 
 to move sections up or down.
oDouble click in the section header to highlight and change the header text.
|
Note that the name specified here will be displayed on the mobile app as the header for that section by default. This header can be disabled in Mobile App Layout mode by un-checking the Show Header check-box. |

oUse the close button  to close the Mobile App Wizard. If there are unsaved changes you will be prompted cancel the request and keep the wizard open, don't save the changes but close the wizard, or save the changes and close the wizard.
oUse the save button  to save any changes and keep the wizard open.
oUse the finish button  to save and finish the mobile app design. You will be prompted to cancel the request and keep the wizard open or to save & finish the mobile app design.
|
You can return to the mobile app design later. |
|
Remember to create sections for each page on your app where you want to see objects on a mobile device. |
|
If you change the app title name in the Attributes section, the change will also apply in the App Properties panel. |
The next step in the Mobile Apps Wizard is to Add Objects to Sections
Return to: Mobile Design
