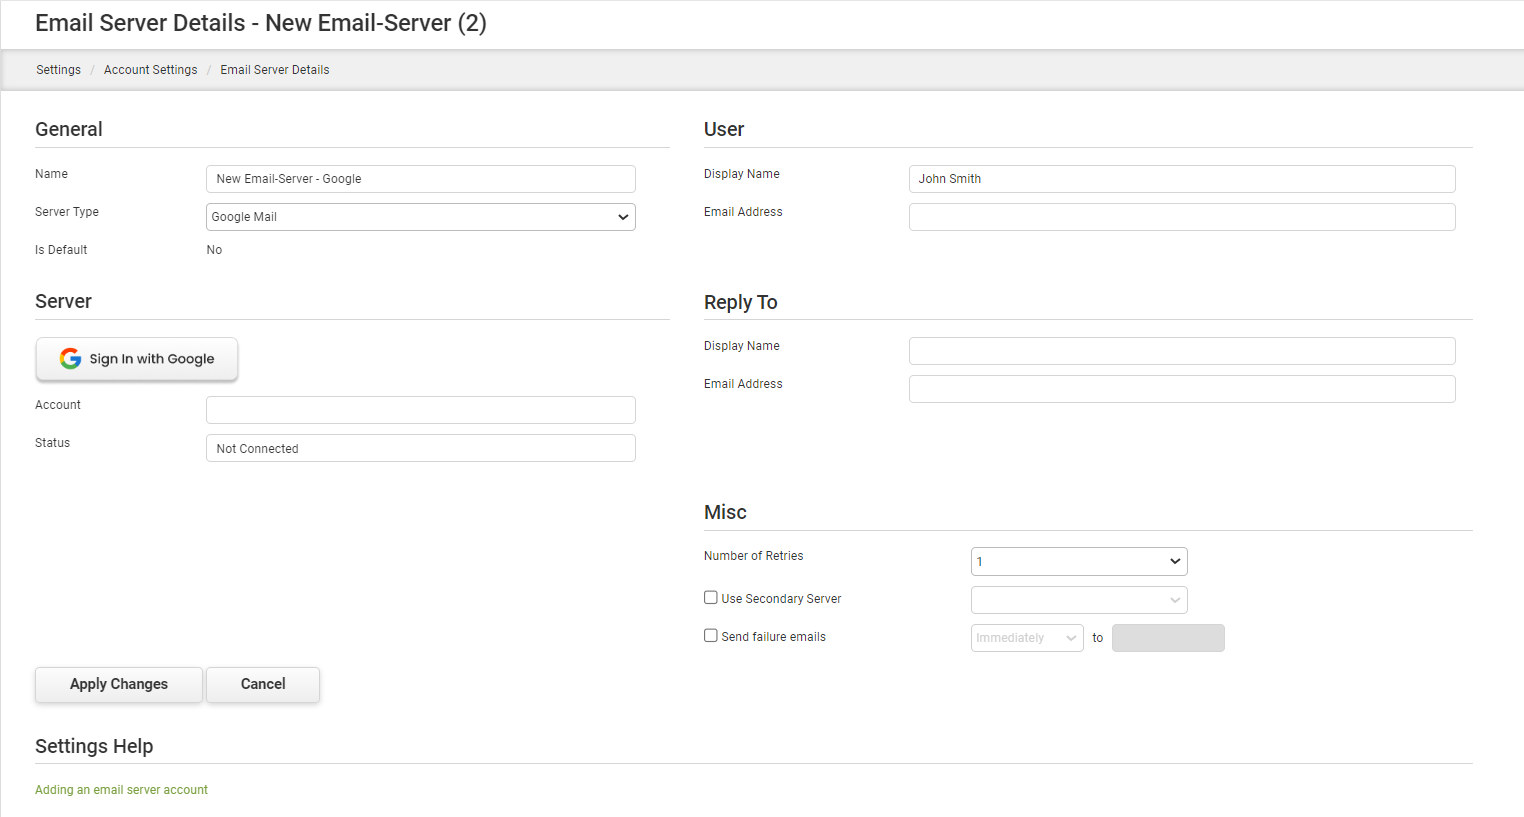
Email Servers are resources that allow you to control the email server from which PerfectApps sends its email messages. Adding email servers as resources at the account level allows you to override the overall system email server and use a custom server to send app notifications and system emails (such as sending a password link, sending an API key and sign-up messages).

|
You must have a Full User account with the added Account privilege in order to create account resources.
|
1.Go to the Settings Dashboard. Click the New button and choose Email Server.
2.On the Email Server details screen, enter a Name for the server under the General section.
3.Choose Basic, Microsoft 365 Exchange Online or Google from the Server Type drop-down.
|
|
In response to Microsoft's announcement that in Office 365 Exchange, they would be disabling Basic Authentication, we have implemented a secure, modern authentication experience for our users. This feature is implemented only for setting up custom Email servers in the Settings Dashboard.
To modify an existing Email server, select the server in your resources list, start at step three above and choose the Microsoft 365 Exchange Online options from the Server Type drop-down.
There are limits when using Microsoft 365 Exchange. For details see: Limits
|
|
|
In response to Google’s announcement that from September 30th, 2024, third-party apps that use only a password to access Google accounts and Google Sync will no longer be supported, we have implemented a more secure, modern authentication experience for our users.
|
 Basic Server
1.Under the Server section, enter the SMTP address in the Name field. The only Type currently supported is SMTP. 2.If the server requires secure authentication, check the Requires SSL box then enter the applicable email username and password below. 3.In the User area, enter the Display Name and Email Address that will be shown to the email recipient on the incoming email. 4.In the Reply to area, enter the Display Name and Email Address that will be shown if the recipient chooses to reply to the email message. 5.Refer to the Failed Notifications section for information regarding the miscellaneous section. 6.Click Apply Changes. 7.After creating the new email server resource, click the Test button to verify the set-up.
|
After establishing the new email server resource, you may set it as the default for this account by clicking the Make Default button. This default selection is the email address by which system emails and notifications by email will be sent unless otherwise overridden in the Notify behavior. If you do not specify an account-level default email server, the system email server will be used.
The only domain that needs to be white-listed is perfectapps.com
PerfectApps uses the following IP address:
129.146.53.210
|
See Notify Command - Email Tab for more information on overriding email server defaults at the behavior level.

|
Alternative Email Server (Basic Authentication)
(3 min)
|
Learn how to define an alternative email server using basic authentication to send notifications.
|
|
Microsoft Exchange Online
1.Click the Sign in with Exchange button. 2.Sign in to your account, or select from a list of your accounts.
3.Enter your password.
4.Approve the sign in request with the Microsoft Authenticator app if that is the case and it is enabled in your Exchange account (Microsoft usually enforces this after 14 days from account creation)
5.Check the consent checkbox on the next screen to allow PerfectApps to connect to your Exchange account, then click the Accept button.
Once accepted, the account Email will appear in the Account box with the status of connected.
6.In the User area, enter the Display Name and Email Address that will be shown to the email recipient on the incoming email. 7.In the Reply to area, enter the Display Name and Email Address that will be shown if the recipient chooses to reply to the email message. 8.Refer to the Failed Notifications section for information regarding the miscellaneous section. 9.Click Apply Changes. 10.After creating the new email server resource, click the Test button to verify the set-up.
|
After establishing the new email server resource, you may set it as the default for this account by clicking the Make Default button. This default selection is the email address by which system emails and notifications by email will be sent unless otherwise overridden in the Notify behavior. If you do not specify an account-level default email server, the system email server will be used.
The only domain that needs to be white-listed is perfectapps.com
PerfectApps uses the following IP address:
129.146.53.210
|
See Notify Command - Email Tab for more information on overriding email server defaults at the behavior level.
|
|
Alternative Email Server (Microsoft 365 Exchange)
(3 min)
|
Learn how to define an alternative email server using a Microsoft 365 Exchange server to send notifications.
|
|
Google Server
|
|
Before proceeding, you must have an account with Google.
|
1.Click the Sign in with Google button. 2.Sign in to your account, or select from a list of your accounts and click Continue. 3.Read the details on the next screen and click Allow to continue 4.Enter your password.
|
After establishing the new email server resource, you may set it as the default for this account by clicking the Make Default button. This default selection is the email address by which system emails and notifications by email will be sent unless otherwise overridden in the Notify behavior. If you do not specify an account-level default email server, the system email server will be used.
The only domain that needs to be white-listed is perfectapps.com
PerfectApps uses the following IP address:
129.146.53.210
|
See Notify Command - Email Tab for more information on overriding email server defaults at the behavior level.
|
See also: Microsoft 365 Exchange Limits
Return to: Return to: Resources, Account Settings, Settings Dashboard, Dashboards & Workspaces