
In order for notification emails and system emails to be sent, you must set up an SMTP email profile that PerfectApps can use as the default for the system. Because the application root URL and email profile are defined during installation, use the Settings page only if you need to change them later.
|

1.On the Settings page, in the Email Server section, enter the profile information: 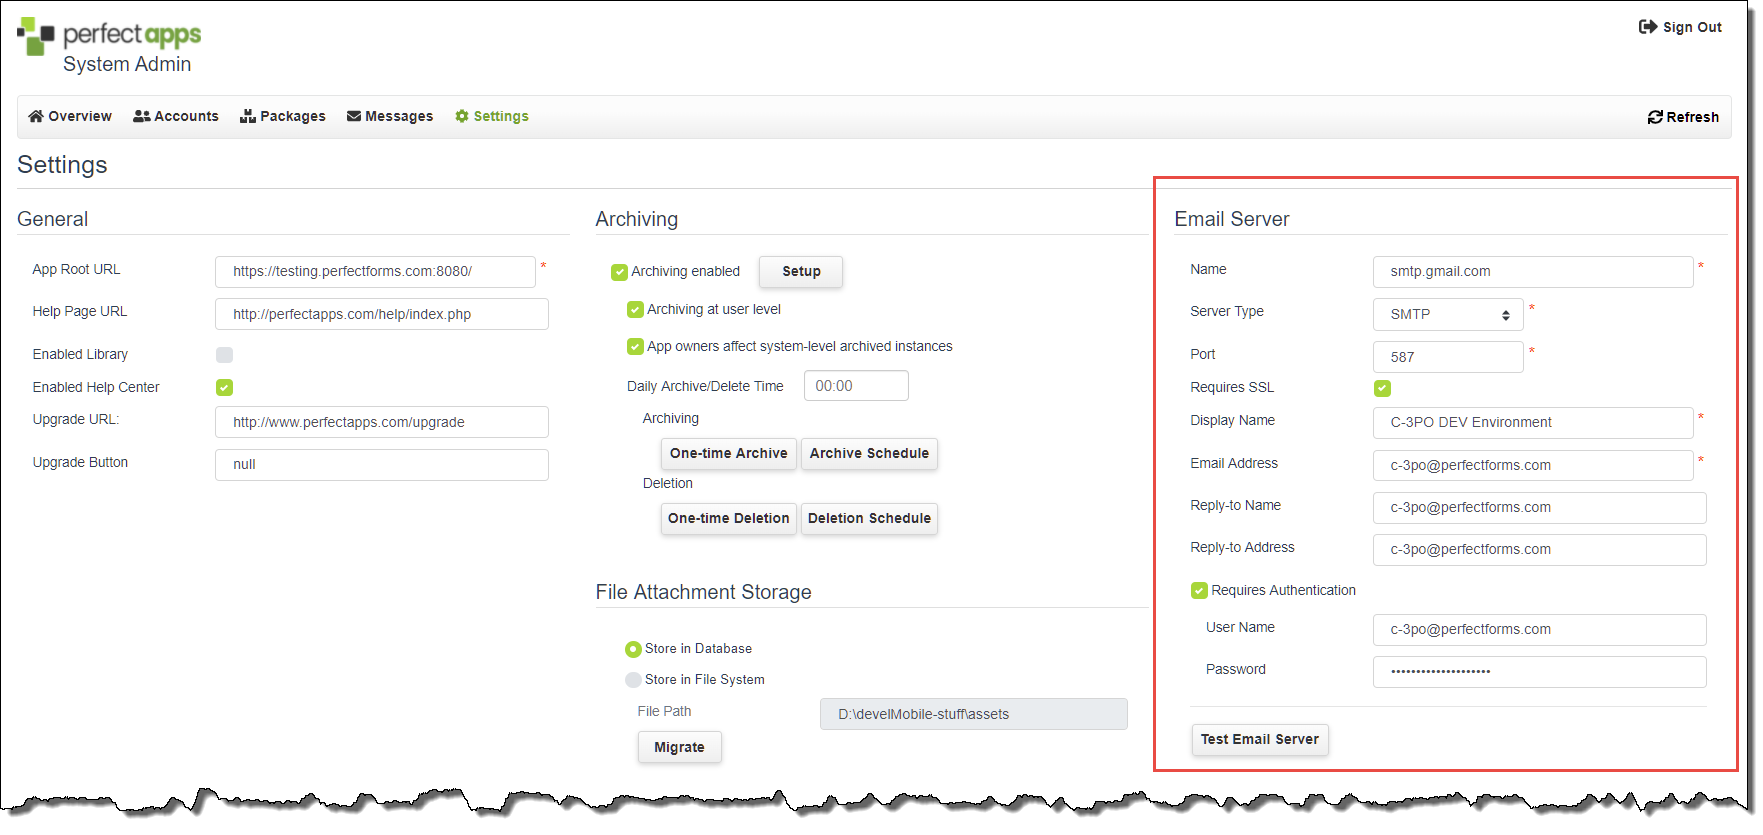 •Name - This is the address of the SMTP server (IP or other). •Server Type - Currently, only SMTP email servers are supported. •Port - Enter the SMTP port number on the server that will be used. •Requires SSL - Select this check box if PerfectApps emails will be sent through a Secure Socket Layer. •Display Name - This is the name that will be shown in the received email. •Email Address - This is the address that will send the messages. •Reply To Display Name (optional) - This is the name that will be shown if the app user decides to reply to a system email. •Reply To Email Address (optional) - This is the address that will receive any replies from users. •Requires Authentication - Select this check box if the SMTP server requires a username and password in order to send the system emails. •Username - Enter a valid system username that has access to the server. •Password - Enter the system password for that username. 2.Click Apply. 3.Click Test Email Server to verify that the email server was configured properly. |
See also: Setting Maintenance Options
Return to: Settings, Administering PerfectApps On-Premise, PerfectApps On-Premise

