Different users will open your app instances at different stages of the workflow. You will almost certainly want to restrict access to specific fields on the app based on the current workflow stage and the user's role when viewing the instance.
Although not the only way to manage this, the recommended way is to define a restrictive rule for All Stages and All Roles and then define exceptions for specific stage and role combinations.
|
The Laying Out Your App and Workflow of your app should be completed before moving to this article. |
Setting up access roles determines who can access what field at any stage.
For reference, a Capital Expenditure Request App is being created for the purposes of this article, and explanations will be visualized using screenshots.
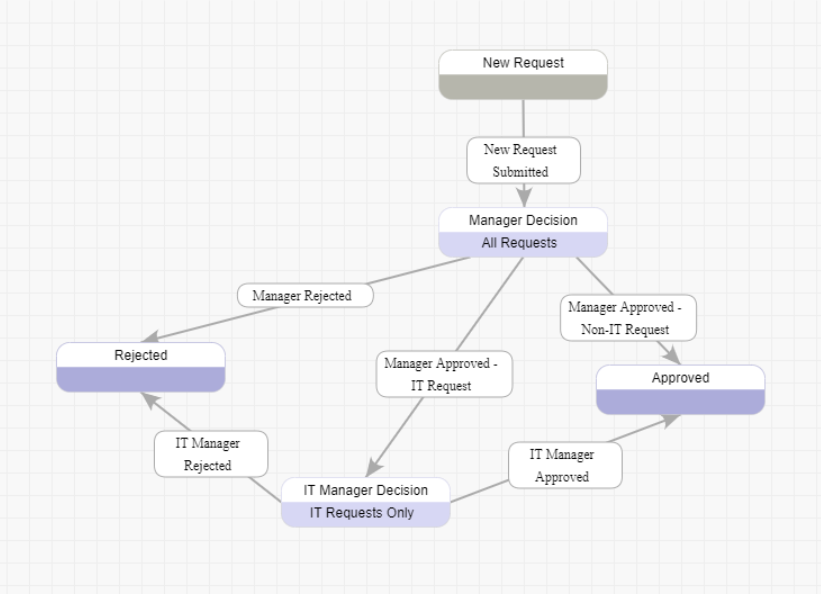
Looking at our Capex Request, it might be helpful to note our workflow stages and the roles we have set up in the app.

The capex workflow has five stages (New Request, Manager Approval, IT Manager Approval, Approved, and Rejected) and 3 Roles (Applicant, Manager, and IT Manager).
It would be best to determine which objects can be completed in each stage and who will complete them. For example:
Field: |
Completed by who: |
Fields not editable at any stage by any role (i.e. fields completed dynamically by behavior included in the app) |
|
Request Date |
Completed dynamically |
Fields completed at the New Request stage |
|
Applicant Name |
Applicant |
Applicant Email |
Applicant |
Manager Name |
Applicant |
Manager Email |
Applicant |
IT Manager Name |
Applicant |
IT Manager Email |
Applicant |
Request Type |
Applicant |
Request Value |
Applicant |
Request Details |
Applicant |
Fields completed at the Manager Decision stage |
|
Manager Decision |
Manager |
Manager Comments |
Manager |
Fields completed at the IT Manager Decision stage |
|
IT Manager Decision |
IT Manager |
IT Manager Comments |
IT Manager |
Once you have completed documenting the access rules, you can transfer that to PerfectApps.
Before we get into the process of setting up access rules for your app, it is important to understand each of the access rules or states that PerfectApps uses:
Default |
The field will retain its previous state from the last submission. |
Normal |
The field is visible and editable for the user. |
Read-Only |
The field is visible but not editable for the user. |
Disabled |
The field is visible but not editable for the user. This is mainly used on radio buttons, checkboxes, and buttons. It will greys the text to prevent the user from making a selection or pressing a button. |
Hidden |
The field is not visible and not editable for the user. |
It is also essential to understand that any rule set at the All-Stage and All-Role combination will have the lowest priority level and be overridden by any rule set at a specific stage or role combination. This is very useful as it means you can apply a standard rule, usually a restriction, for all stages and roles and then apply an exception to that rule for specific stages and roles where you want access to be allowed.
While there are a few different ways to manage your access rules, we recommend this method of a standard restriction followed by exceptions. It is relatively simple to understand and works equally well for simple and more complex workflow processes.
An important detail to note is that roles are not yet assigned in the Default stage of the app; roles are only assigned once the app has been submitted and a notification, with the role embedded, has been sent to an individual or group of people.
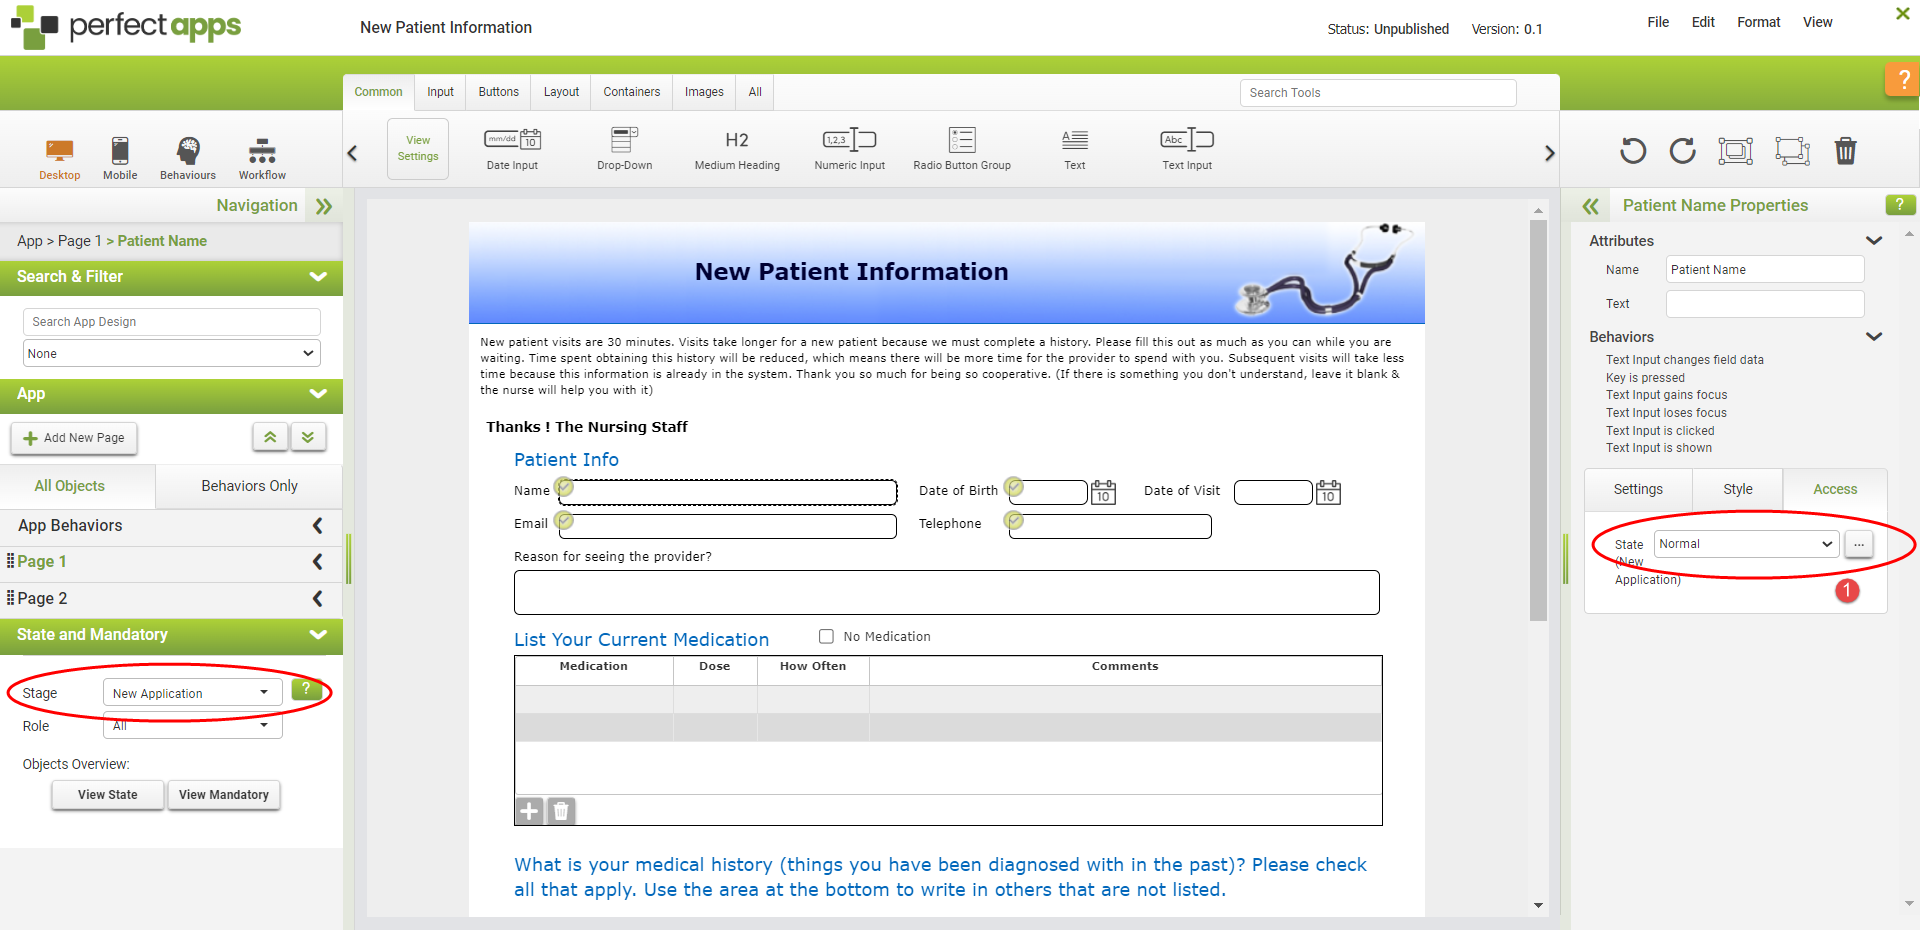
This means that for the Default stage (New Request using the example above), all fields editable by the applicant must be in the “Normal” state for all roles.

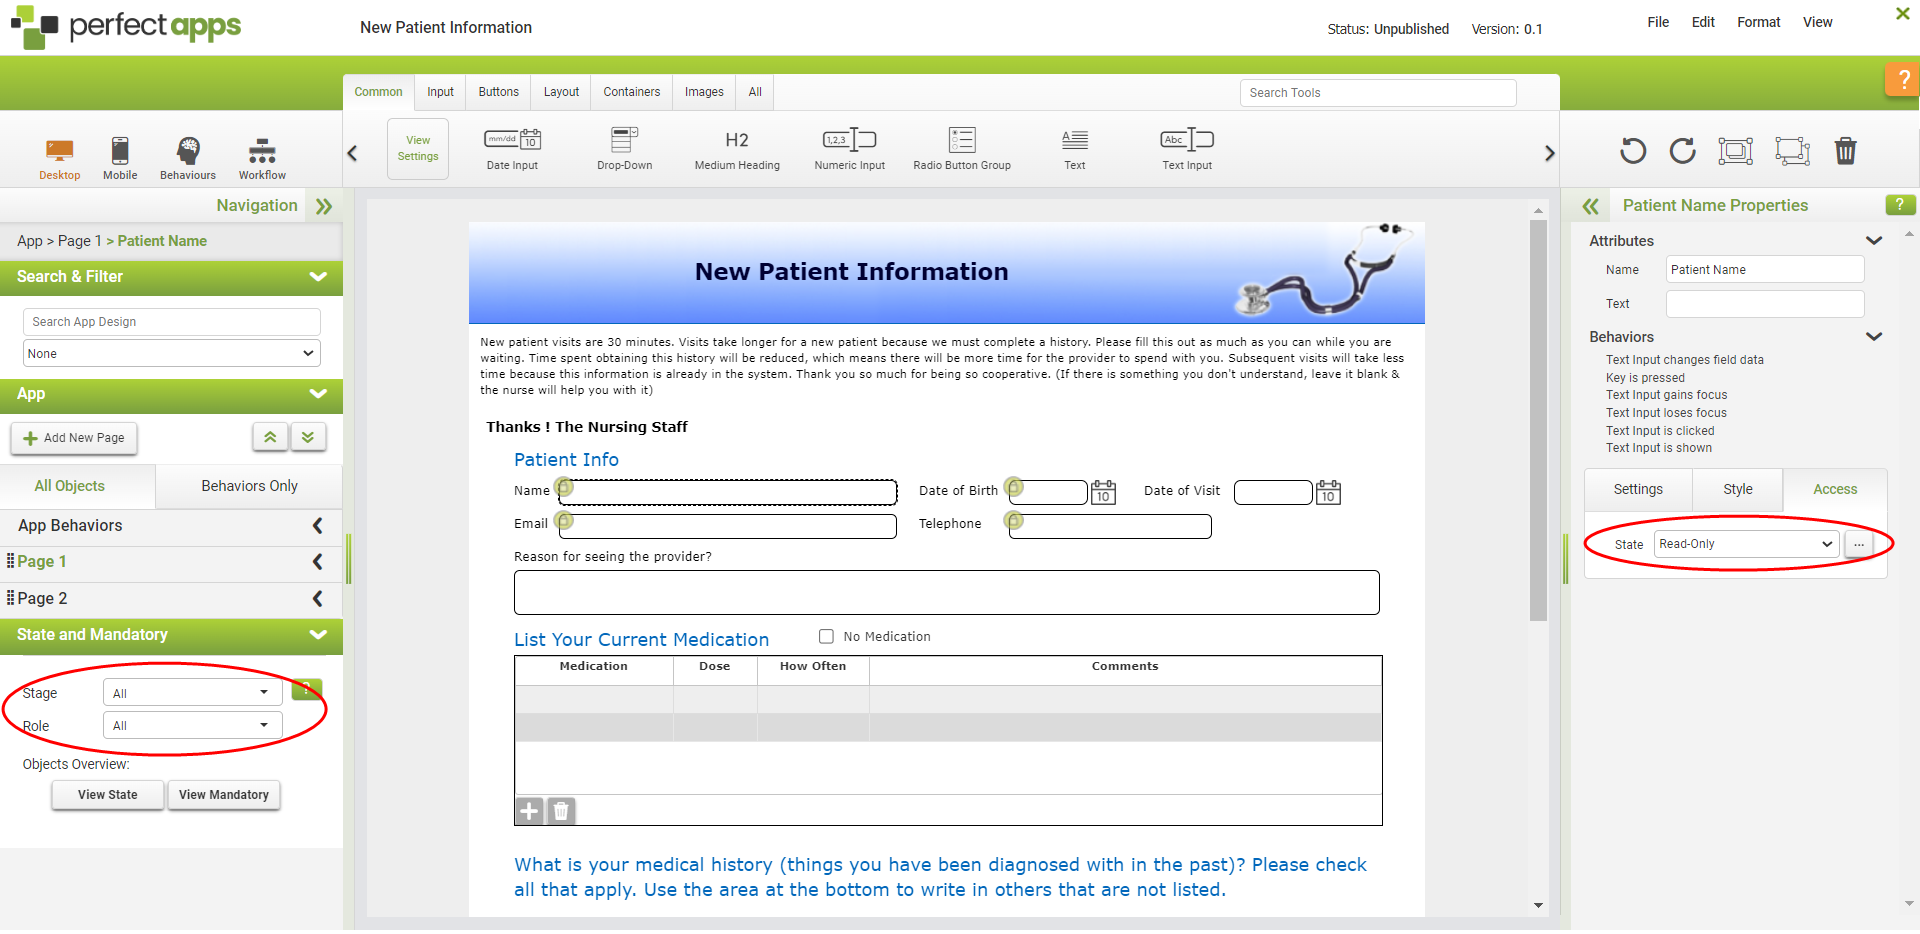
1.The first step is to apply your standard restrictive rule for the necessary fields. In the navigation panel on the left, make sure that the ALL setting is selected for both the Stage and Role.
2.Select the object(s) you want to set states for, and in the object properties and Access section, select your restriction. In our example this is Read-Only but it could also be Disabled or Hidden when appropriate.

3.The next step is to specify the exception(s) to the rule. In this example the exception is when the app is at the default stage of 'New Request'. At this stage the field(s) should be Normal. Remember that no roles have been defined at the default stage so you MUST use the Role = All setting.

Repeat this process for all fields on the app.
 |
If you look to the right of the state drop-down (see 1 above), you will see an ellipses button. This button displays an overview of an object's different states by stage and role combination. It can also be useful for setting exceptions to the standard restrictive rule. |
 |
For more information on this topic, see Limiting User Access to App Fields |
Introduction (4 min) |
This is an introduction to the topic of field access rules. Watch this tutorial video first to learn about the app designer elements used in setting this type of logic. |
|
Access Rules on Input Fields (3 min) |
There are a few different ways that access rules can be set. In this tutorial you will see the recommended method used on input fields on your app. |
|
Non-Input Field States (2 min) |
While the main focus of restricting access will be on input fields, it will also be necessary to control the states of some non-input fields like text labels and buttons. |
|
Access Rules & Groups (2 min) |
Although the general methods for groups remain the same, there are a few specific things to be aware of. Watch this video to learn more. |
|
Access Rules & Tables (2 min) |
Table objects also need special consideration when setting access rules. Learn about it in this tutorial. |
If you have completed all the sections in this Quick Start Guide, then your app should now be complete and ready for testing.
Next: Testing Your App
Return to: App Design - Getting Started, QuickStart Tutorials

