Notifications are also included on the workflow paths. If the condition on a path is true when the app instance is submitted, any notifications and other behavior on that path will be triggered as the app instance follows that path.
The notifications are used to send information to users during the process and, in many cases, include a link to allow that person to re-open the instance and take some action on the app.
In the Creating User Roles section, you saw how a User Role can be linked to a person or group using the Default Person feature. This section will show how this link can help assign notifications to the right person or people.

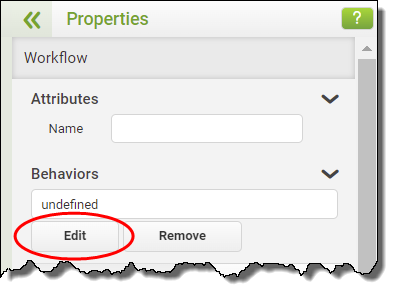
1.Start by selecting the path to which you want to add a notification. The path should be highlighted in yellow, and the path properties will be displayed in the right hand properties panel.
|
Any text that you add into the Attributes / Name section will appear as a comment on the workflow path. Although it's not essential, adding comments to your diagram can help. |
2.In the Behaviors section, click the Edit button to open the behavior canvas for that workflow path.

3.Drag a Notify command onto the canvas.

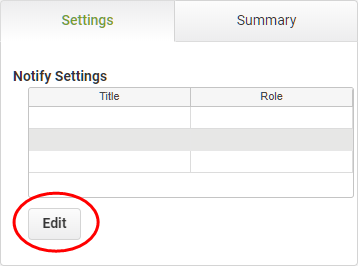
4.Click the Edit button to open the Notify command dialogue box. There are two sections in the Notify command dialogue box. There is a table at the top; you can add new or remove existing notifications from here. In the lower section, the notification parameters are specified.
5.Click the Add button underneath the top table section to add a new notification to the list.
6.In the General tab, include a Title, select an Attention Level and select the Role of the person who will receive the notification.
a.The title will only be seen by licensed PerfectApps users but it is still worth making this user-friendly to identify what the notification is for.
b.Only licensed users who access the PerfectApps System Dashboard can see the attention level. Select an attention level appropriate for the urgency of the notification. You probably don't need an attention level for' information only' type notifications.
c.The role is very important, as the link between the role and default person mentioned earlier will ensure that the notification goes to the right person. The role is also embedded within any link sent with this notification, thus defining the role of the person that uses the link to re-open the app instance.
7.In the Person tab, you usually leave the default setting to Send notification to: Person assigned to this role. This ensures that the notification will go to the Default Person. If you override this setting you must carefully choose an option that sends the notification to the correct person.
8.In the Time tab, you can specify when the notification will be sent, The default setting of Now is usually the best option, but other options may be helpful for delayed notifications, such as reminders or escalations.
9.The Cancellation tab is also best left as the default setting. Cancelling only removes the notification from the PerfectApps Notification Dashboard and doesn't cancel the request.
10.In the Message tab, you define the message you want to send to the recipient. In most cases the notification will go by email, so leave that option checked unless you have a specific reason not to.
a.Use the Insert Field button to insert data from a field in the app instance into the message. Typically you might want to include the name of the person making the request. You can insert field data into both the subject and body of the message.
b.Use the Insert Link button to insert a link to enable the recipient to re-open the request. Remember that the role is embedded in this link. You can only insert a link into the body of the message.
c.Use the Insert App Instance Number button to insert the app instance number into the message. The app instance number is generated by the system, is unique to the app and is incremental.
d.The Attachments button includes attached files and other files into the message. It does require an extra license. More details can be found here Attachments in Notifications.
11.The Email tab is used when you want an alternative email server to send your notification. More information is available here Notify Command - Email Tab
Repeat the above instructions for every notification you want to send out on each workflow pathway.
|
You can include more than one notification in a single Notify command. |
Notifications (5 min) |
Learn how to add notifications to your workflow diagram. When triggered these notifications will be sent to users to alert them to app instances that need their attention. |
|
Reminders & Escalations (4 min) |
Reminder & escalation notifications play a big role, ensuring that app instances don't get stuck if someone forgets to take action. |
Next: Field Access Rules
Return to: Managing Your Workflow Logic, App Design - Getting Started, QuickStart Tutorials


